Roti, a staple in many cultures, is not just a flatbread; it's a labor of love and an art form. While it seems deceptively simple, many people often make mistakes in preparing the perfect roti. From kneading the dough to the final bake, let's explore the journey of making flawless roti.
Before diving into the details, let's understand why it's crucial to master the art of making perfect roti.
Roti is a cultural symbol in many parts of the world, signifying togetherness and tradition. Getting it right is essential to preserve these traditions. In Indian households, for instance, roti represents more than just a type of bread; it symbolizes the warmth of family gatherings and traditions passed down through generations.
Nutritionally, roti provides a significant portion of daily carbohydrates. Ensuring it's made perfectly enhances its digestibility and nutritional value. Made with whole wheat flour, it offers complex carbohydrates, dietary fiber, and essential nutrients. Mastering the art of roti-making ensures that these nutritional benefits are fully realized.
Perfect roti has a soft, fluffy interior and a slightly crispy exterior. Achieving this balance elevates the dining experience. The softness of the interior complements the crispy exterior, making each bite a delightful experience. A well-made roti is not just about sustenance; it's about savoring the taste and texture.
The journey to perfect roti begins with the dough. Many mistakes happen at this stage.
Accurate measurements are key. Use a standard cup for consistency. The process begins with measuring the ingredients meticulously. You want to maintain the right proportion of whole wheat flour and water. A standard cup or measuring tools will ensure that you have the right mix.
Add water gradually. Too much can make the dough sticky, and too little results in a hard dough. When adding water, do it gradually. The right amount of water is crucial to achieve the desired texture. A gradual addition allows you to control the dough's consistency, preventing it from becoming too sticky or too hard.
Let the dough rest for at least 30 minutes. This relaxes the gluten and makes rolling easier. The resting period is often overlooked but plays a crucial role. Allowing the dough to rest for at least 30 minutes relaxes the gluten, making it more pliable and easier to work with. It also contributes to the roti's softness.
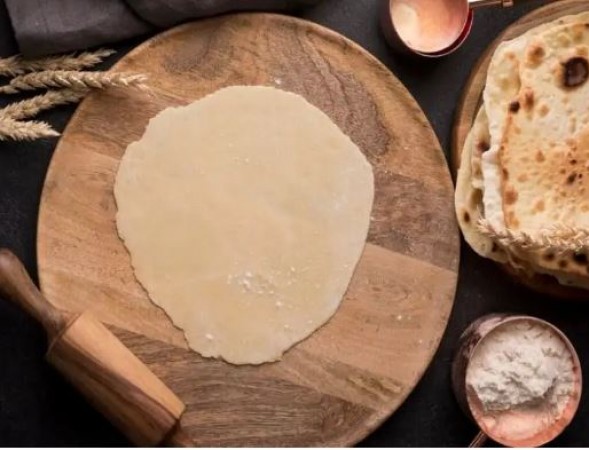
Rolling the dough is where many people struggle.
Divide the dough into equal portions for uniform roti. After the resting period, divide the dough into equal portions. This ensures that each roti is of uniform size, and it's much easier to control the cooking process with equal-sized portions.
Roll the roti evenly. An inconsistent thickness can lead to uneven cooking. Maintaining an even thickness is vital to achieving consistent results. An uneven thickness can lead to some areas being undercooked while others are overcooked.
Dust with dry flour while rolling to prevent sticking. When rolling the dough, it's essential to prevent sticking. Lightly dusting the rolling surface and the rolling pin with dry flour helps to keep the dough from adhering to the surface.
The cooking process is where the magic happens.
Preheat the pan properly. Too hot or too cold will affect the outcome. The right pan temperature is essential. Preheat your pan properly; it should be hot but not smoking. If the pan is too hot, the roti may burn before it's properly cooked, and if it's too cold, the roti won't puff up as it should.
Don't overcook. Roti should have light brown spots, not be burnt. Timing is everything. Overcooking can result in a hard and brittle texture. Roti should have light brown spots, indicating that it's cooked but not overdone.
Flip the roti at the right time. It should puff up before flipping. The moment of truth comes when you see your roti puffing up. This indicates that it's cooking well. Wait for this puffing, then flip it. If it doesn't puff, check if the pan is hot enough.
Here are some common mistakes people make while making roti:
Avoid haste; making roti is a patient process. One of the most common mistakes is rushing through the process. Making perfect roti requires patience and attention to detail. Rushing can lead to errors in measurements, uneven thickness, and overcooking.
Properly knead the dough for a soft texture. Inadequate kneading can result in a hard or uneven texture. Kneading is a crucial step in roti-making, and it's important not to cut corners.
Roll uniformly to ensure even cooking. An incorrect thickness can result in unevenly cooked roti. It's essential to maintain an even thickness throughout the rolling process.
Cover roti with a clean cloth to keep them moist. Leaving roti uncovered can lead to them drying out and becoming tough. To keep roti soft, cover them with a clean cloth or paper towel.
Cooking for too long results in hard roti. Overcooking can be a result of not paying attention to the cooking process. It's vital to watch for the right signs and flip the roti at the right time.
To avoid these mistakes and create the perfect roti, follow these tips:
Making roti is a skill. Practice regularly. Like any skill, making perfect roti requires practice. The more you practice, the better you'll become at kneading the dough, rolling it evenly, and cooking it to perfection.
Maintain consistent measurements and techniques. Consistency in measurements and techniques is essential to ensure that every roti you make turns out as desired.
Invest in a good rolling pin and non-stick pan. Quality tools make the process easier. Investing in a good rolling pin and a non-stick pan can significantly improve your roti-making experience. Cooking the perfect roti is an art that takes time and practice to master. From kneading the dough to getting the timing right, each step contributes to the final result. By avoiding common mistakes and following these tips, you can enjoy the cultural and nutritional benefits of perfect roti.
Holidays relieve stress, know the countless benefits of travelling
Vriddhakali: Where Hospitality Meets Breathtaking Landscapes