Tying a tie might seem like a daunting task, especially if you're not used to wearing formal attire regularly. However, with a little practice and guidance, you can master the art of tying a tie like a pro. Whether you're preparing for a job interview, a special event, or just want to add a touch of sophistication to your appearance, knowing how to tie a tie is an essential skill for any gentleman. In this article, we'll walk you through the process of tying a tie step by step, using easy-to-follow instructions and visuals.
1. Selecting the Right Tie
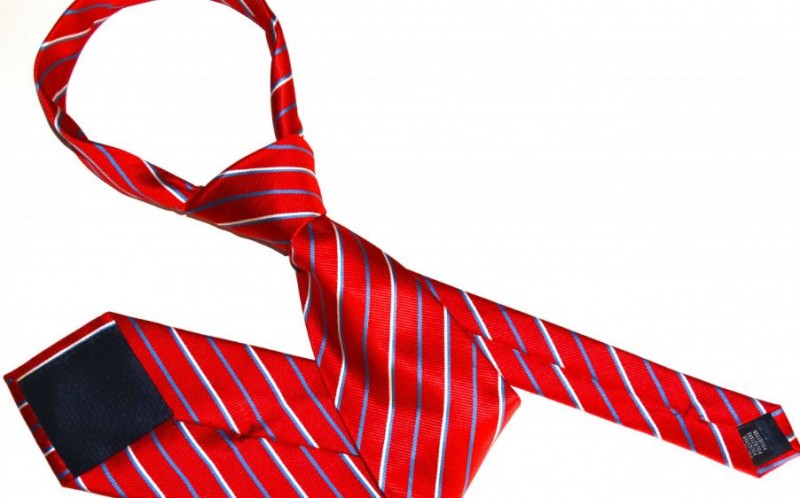
Before you start tying your tie, it's crucial to choose the right one. Consider the occasion, your outfit, and your personal style. Silk ties are the most common and versatile, but you can also opt for other materials like cotton or wool, depending on the formality of the event.
2. The Four-in-Hand Knot
The Four-in-Hand knot is one of the most popular and easiest knots to learn. Follow these steps to tie the Four-in-Hand knot:
- Drape the tie around your neck, with the wide end on your dominant side and the narrow end on your non-dominant side.
- Cross the wide end over the narrow end, creating an X-shape.
- Wrap the wide end behind the narrow end, from right to left.
- Bring the wide end over the front of the narrow end again.
- Pass the wide end through the loop around your neck.
- Hold the narrow end and slide the knot upwards, adjusting it until it's snug but not too tight.
3. The Half-Windsor Knot
The Half-Windsor knot offers a slightly more formal and symmetrical look. Follow these steps to tie the Half-Windsor knot:
- Begin with the wide end on your right side and the narrow end on your left side, just like the Four-in-Hand knot.
- Cross the wide end over the narrow end, forming an X.
- Bring the wide end up and behind the loop around your neck.
- Bring the wide end back over the front from right to left.
- Pass the wide end through the loop again.
- Carefully pull the wide end down and tighten the knot.
4. The Windsor Knot
The Windsor knot is a classic, full and triangular knot, perfect for special occasions. Here's how to tie the Windsor knot:
- Start with the wide end on your right side and the narrow end on your left side.
- Cross the wide end over the narrow end, creating an X-shape.
- Wrap the wide end behind the narrow end, moving from right to left.
- Bring the wide end up and over the loop around your neck.
- Pass the wide end through the loop again.
- Carefully pull the wide end down, adjusting the knot to your desired tightness.
5. The Bow Tie
The bow tie adds a touch of elegance and charm to your outfit. Follow these steps to tie a classic bow tie:
- Place the bow tie around your neck, with one end slightly longer than the other.
- Cross the longer end over the shorter end, creating an X.
- Bring the longer end up and over the X, forming a loose bow shape.
- Fold the shorter end horizontally, forming the front loop of the bow.
- Drape the longer end over the front loop.
- Push the longer end through the loop behind the front loop.
- Adjust the bow tie by pulling the ends gently and symmetrically.
6. The Pratt Knot (Shelby Knot)
The Pratt Knot, also known as the Shelby Knot, is a versatile and medium-sized knot suitable for most occasions. Here's how to tie the Pratt Knot:
- Start with the tie draped around your neck, wide end on the right and narrow end on the left.
- Cross the wide end over the narrow end, forming an X.
- Bring the wide end up and tuck it down behind the loop around your neck.
- Wrap the wide end around the front from right to left.
- Pass the wide end through the loop around your neck.
- Hold the narrow end and tighten the knot by sliding it up.
7. The Eldredge Knot
The Eldredge Knot is a complex and eye-catching knot, perfect for making a bold fashion statement. Follow these intricate steps to tie the Eldredge Knot:
- Begin with the wide end on your right side and the narrow end on your left side, at different lengths.
- Cross the wide end over the narrow end, forming an X.
- Wrap the wide end behind the narrow end from right to left.
- Bring the wide end up and over the front of the loop.
- Pass the wide end through the X and tuck it behind the loop.
- Bring the wide end across the front horizontally.
- Take the wide end behind the narrow end from left to right.
- Pass the wide end through the loop once again.
- Tuck the wide end behind the loop and adjust the knot accordingly.
Mastering the art of tying a tie may take some practice, but with dedication, you can become proficient in creating a variety of stylish knots. Each knot offers a unique appearance, allowing you to tailor your tie to match any occasion. Remember to choose the appropriate tie knot based on your outfit's formality, and don't be afraid to experiment with different knots to add personality to your look.
Six Techniques That Can Help Battle Male Infertility
How does Hepatitis Influences Diabetes and HIV?
Uttarakhand: Badrinath Highway Washed Away in Chamoli Amid Heavy Rain