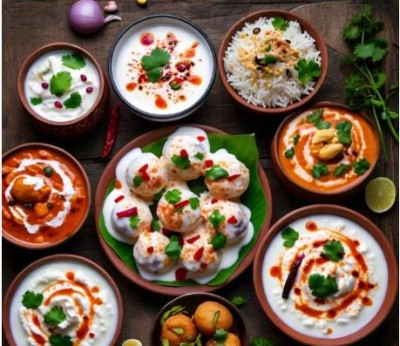
If you're a fan of South Indian cuisine, you've undoubtedly relished the soft and fluffy goodness of idlis. These steamed rice cakes have become a breakfast favorite not just in India, but around the world. The secret behind perfect idlis lies in the idli batter preparation. In this guide, we'll delve into the art of making idli batter at home, uncovering the tricks that will help you achieve idli perfection.
Understanding the Basics
What is Idli?
Idli is a traditional South Indian dish made from fermented rice and urad dal (black gram) batter. The batter is steamed to create light, spongy, and nutritious cakes. Idlis are not only delicious but also easy to digest, making them a healthy choice for all ages.
The Importance of Batter Preparation
The key to making great idlis lies in the idli batter. Proper preparation of the batter involves a few crucial steps that contribute to the texture and taste of the final product.
Ingredients You'll Need
Before we dive into the preparation process, let's gather the necessary ingredients:
You'll need:
- Idli Rice: This is a parboiled rice variety specifically used for idlis. It's available in most Indian grocery stores.
- Urad Dal (Black Gram): Urad dal adds the necessary softness and fluffiness to the idlis.
- Fenugreek Seeds: These seeds aid in fermentation and give a characteristic flavor to the batter.
- Salt: To enhance the taste of the idlis and assist in fermentation.
- Water: Used for soaking and grinding the rice and dal.
The Step-by-Step Process
Step 1: Soaking
- Start by rinsing the idli rice thoroughly. Soak it in water for about 4-6 hours.
- Similarly, rinse the urad dal and fenugreek seeds and soak them together for the same amount of time.
Step 2: Grinding
- Drain the water from the soaked urad dal and fenugreek seeds. Grind them together, adding water in intervals, until you get a smooth and fluffy batter. This might take around 20-25 minutes.
- Transfer the urad dal batter to a large bowl.
Step 3: Grinding the Rice
- Grind the soaked rice in batches. Add water gradually and grind until you achieve a fine, but slightly grainy texture.
- Combine all the rice batter in the same bowl as the urad dal batter.
- Mix the batters thoroughly with clean hands, adding salt. The mixing action also helps in the fermentation process.
Step 4: Fermentation
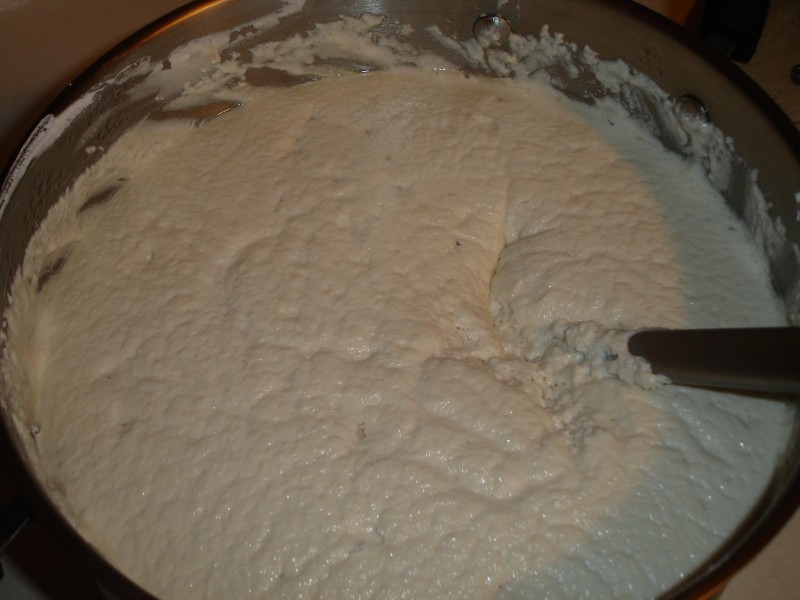
- Cover the bowl with a clean cloth and place it in a warm, undisturbed area to ferment. This usually takes around 8-12 hours, depending on the temperature.
- The batter should double in volume and develop a slightly tangy aroma when properly fermented.
Step 5: Steaming
- Once fermented, give the batter a gentle stir. If it's too thick, you can add a little water to achieve the desired consistency.
- Grease the idli molds with a drop of oil and pour the batter into each mold.
Step 6: Steaming
- Bring water to a boil in the idli steamer or a large pot.
- Place the idli molds in the steamer and steam for about 10-12 minutes on medium heat.
- To check if the idlis are done, insert a toothpick. If it comes out clean, your idlis are ready!
Expert Tips for Perfect Idlis
- Fermentation Magic: The quality of your idlis depends largely on fermentation. Ensure a warm environment for fermentation, especially in colder climates.
- Right Consistency: The batter should be thick yet pourable. It shouldn't be too runny.
- The 1:2 Ratio: Use 1 part urad dal to 2 parts rice for a balanced idli batter.
- A Dash of Fenugreek: Fenugreek seeds not only aid fermentation but also add a unique flavor to the idlis.
- Say No to Over-Grinding: Over-grinding the rice can make the idlis hard, so aim for a slightly grainy texture.
Troubleshooting Common Issues
If Your Idlis Turn Out Hard:
- The batter might not have fermented adequately. Give it more time next time.
- The urad dal might not have been ground well. Properly ground urad dal is crucial for soft idlis.
If Your Idlis Turn Out Flat:
- The batter might have been too watery. Achieve the right consistency next time.
- The fermentation process might not have happened correctly. Ensure a warm environment for fermentation.
Mastering the art of idli batter preparation at home might take a few attempts, but the rewards are absolutely worth it. With the right ingredients, proper techniques, and a touch of patience, you'll soon be enjoying homemade idlis that rival those from the best South Indian restaurants.
Remember, each batch of idlis is a step closer to perfection. So, embrace the process, experiment, and relish the journey of creating these delightful, steamed treats in your very own kitchen.
Take these herbs with you when you're traveling to prevent indigestion
Here are seven practical methods to cut back on daily drinking
Are You Getting a Message from Your Vision? Stroke Warning Signs that May Appear in Your Eyes